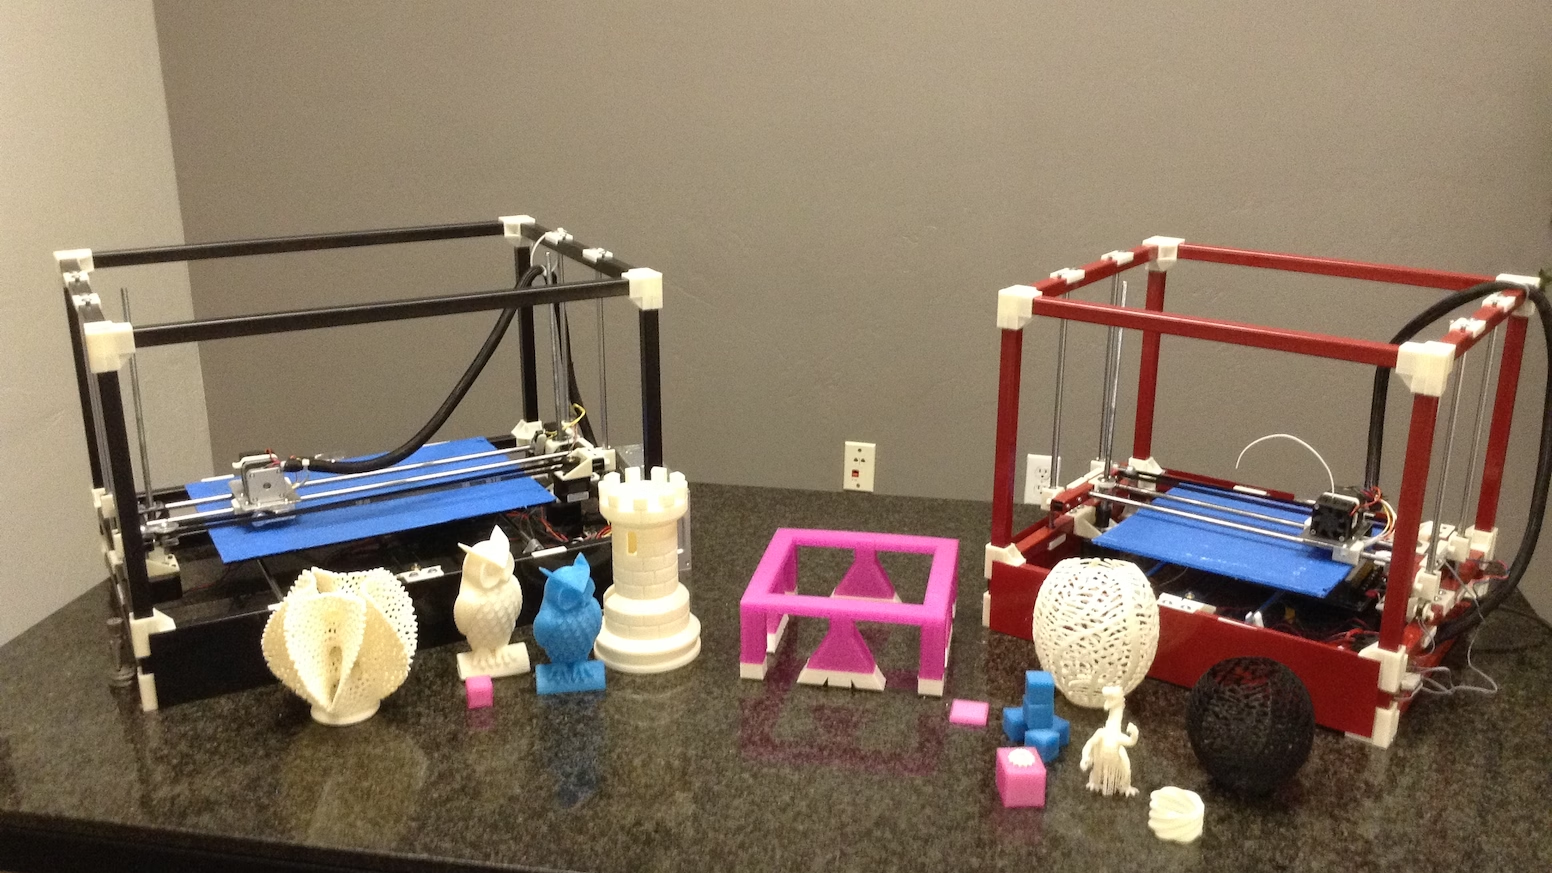
Repair a Free 3D Printer (curb find)
Curb Alert!
An apartment of mine had a well known area where people would leave things next to the dumpster. Usually someone would be moving out and leave a few things behind. I would walk my dog on a fairly regular basis so I often ended up getting first dibs.
One day I go out, to my surprise and excitement I find a 3D printer sitting out on the curb. I go grab it and take it inside to assess the damage. All the pieces were in place, it had three spools of PLA to use for printing, a working power supply, a box with extra parts that enabled a dual extruder setup to do prints in multiple colors. At this point I’m thinking what a jackpot there has got to be something wrong with it and whatever it is I’m gonna fix it.
There’s nothing better than getting something for cheap or free because you were willing and able to fix it.
Finding what’s wrong/broken
I lookup the printer model to find out it is a RigidBot Big from a Kickstarter campaign. The special sauce was the large 12x16 inch heated print bed that was normally in a completely different price range.
Official documentation is rather sparse and the original website was no longer being hosted online. There were some YouTube videos on building it but mine was already built, so I was extremely grateful to find the community page for RigidBot Wiki.
The wiki was a great knowledge base. It had information about different mods people had done, the supported firmware and the history of the project including info about ReliaBuild 3d. They picked up the mantle once the Kickstarter was over and continued with the RigidBot design. They had new and improved models they produced of the RigidBot, but I was interested in their replacement-upgrade parts for the Kickstarter models.
Replacement parts came later, my first course of action was finding why someone had put it to the curb. I started out by re-flashing the firmware with the community enhancements and went through the setup process. I was able to verify the x, y and z axis motors were in working order. Same went for the extruder motor a simple retraction of the PLA filament showed it working. Finally I run into trouble while calibrating the extruder temperature. I kept getting thermal runaway errors.
Replacement parts
I learned that this was a safety feature; where in the event of the thermostat malfunctioning you don’t want the heater cartridge to continue getting hotter and hotter till the printer melts or worse starts a fire. So there it was, the thermostat was not working correctly. I ordered a replacement thermostat along with a few upgraded parts for the extruder and nozzle. Looked like I could get a perfectly good printer for just $70 in new parts.
Continued troubleshooting
After the new and improved parts were installed I was still getting similar issues. Overall the thermostat did not seem to line up with actual temperatures. I was under the impression that the new thermostat was a different model than the original. If that were the case I would need to find out what was the appropriate thermostat to set in the firmware.
I began by learning about the thermostat values and playing around with them. The firmware had configurations for several different thermostat brands where each had a series of temperatures to expected resistance values. Makes sense a digital thermostat is just a variable resistor where the variable is heat, so each temperature has a set resistance. The playing around I did was to make my own table that matched up with the temperature I was reading.
No, this does not mean I touched the hot end. I just pushed through some filament until it was extruding nicely. That let me know the temp was in the ballpark of 180-210 °C so from that I had an idea of what was the resistance for the temperature range I wanted to be in. I calculated each resistance values for any specific temperature by following the trends I found in other thermostats. At high temps the resistance delta was around 20 and low temps were around 3.
1
2
3
4
5
6
7
8
9
10
11
12
13
14
   {322*OVERSAMPLENR, 210},
   {344*OVERSAMPLENR, 205},
   {366*OVERSAMPLENR, 200},
   {390*OVERSAMPLENR, 195},
   {415*OVERSAMPLENR, 190},
   {440*OVERSAMPLENR, 185},
   {467*OVERSAMPLENR, 180},
   {494*OVERSAMPLENR, 175},
   {522*OVERSAMPLENR, 170},
   ...
   {1000*OVERSAMPLENR, 45},
   {1004*OVERSAMPLENR, 40},
   {1007*OVERSAMPLENR, 35},
   {1010*OVERSAMPLENR, 30},
After filling in a custom thermistor table using a bit of calculations mixed with the guess and check strategy; the values were good enough for me to work with. It was not important how much the temps were off, but so long as I’d found a steady temp for the filament to extrude at I could have a successful print.
Future me: continued investigation found that the controller board for the 3d printer had a partial short. The thermistor readings were off because of this.
I successfully fixed a great curb find
Now it is working, I start my journey into the world of 3D printing with a fairly massive printer at a rock bottom price. Is it the best or easiest? No, it requires a lot of knowledge and time to fix things if there’s a printer jam, but I love myself a good project. It’s a labor of love to bring something so cool back to life.